The packing brush and burnishing brush are two tools that that can be used to create larger batts on a drum carder. Making a thicker, heavier batt results in the batt staying together better when removing it from the carder and increases efficiency by reducing the amount of time spent removing batts.
So, Why Two Tools?
At first glance, it might seem redundant to have two tools with the same purpose. However, each has their strengths and weaknesses and using them in the wrong application will decrease your efficiency and may degrade your fiber.
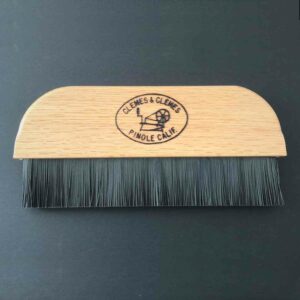
The Packing Brush
The Packing Brush has nylon bristles and can increase the size of a batt by as much as 30 percent. It is gentle on fine fibers and will not tear them, and we have found that it tends to dissipate static to some degree when working with fine, flyaway fibers such as alpaca, angora bunny, and mohair.
The Burnishing Brush
The Burnishing Brush looks like a hand carder, except its metal teeth are long and straight. Using this brush can increase the size of a batt by as much as 50 percent. This extra packing power does come at a cost, as the burnishing brush will create nepps in fine or tender fibers.

When & How To Use Either Brush
“Early and often” is a good reminder for when to use either the packing or burnishing brush. Our recommended practice is to measure the fiber you will use for the batt into four to six equal amounts, and pack after feeding each {sub-amount}.
When using either brush, make sure the bristles or teeth are perpendicular to the teeth of the drum carder. This will apply force onto the fiber and achieve the desired effect of packing the batt.


Specific Use Cases
A general rule of thumb is that medium wools (Corriedale, Bond, etc,) and Long Wools (Romney, Border Leicester, etc.) will hold up to the Burnishing Brush, while fine wools (Merino, Cormo, etc,) will tend to tear and create nepps with the hefty friction of the burnishing brush. As such, we recommend using the Packing Brush for fine fibers.
On the other hand, the extra friction created by the burnishing brush can be used to intentionally create nepps when one wants more texture in a batt for art yarn or for felting. Speak of art batts, many inclusions (sari silk scraps, yarn scraps, wool nepps, etc.) need to be packed in using the Burnishing Brush.
When carding fiber to be removed as rolags or as carded sliver (roving), we recommend using the Packing Brush. This will pack the batt while still allowing the fibers to slide easily for removal with a dowel or Diz.
One Project + Two Brushes = Maximum Efficiency
Most of the time, you will likely select one brush to use for the duration of your project. Using both brushes could be advantageous in certain instances – such as when carding a coarse or medium wool with the desired goal of rolags or carded sliver. In this case, you might use the burnishing brush for several passes through the carder to create a two to three ounce batt, then weigh out just one ounce for a final pass in which you use the packing brush before removing your ready-to-spin rolags or sliver.
The right Tool For the Right Job, Every Time
As you now know, there’s a reason we include both the Packing Brush and Burnishing Brush with our Elite Series Drum Carders: they both have specific, nuanced applications that can help you achieve your drum carding goals. While some fiber artists prefer one over the other due to their carding style or the fibers they tend to work with, we find that most people end up using both as they progress from one project to another and sometimes even in the same project. Please feel free to reach out with any questions about which brush might be best suited for your project or application.